rclone配置google drive上传教程
2022/9/8日更新整理,之前的已经不适用了。
rclone v1.59.1
之前配置 gd 的方法是会返回一个网页链接进行授权,只需要本地浏览器打开后,登陆,复制获取到的代码粘贴回车就行。
随着 rclone 更新到 v1.57 后,新版本提示:
Option config_token.
For this to work, you will need rclone available on a machine that has
a web browser available.
For more help and alternate methods see: https://rclone.org/remote_setup/
Execute the following on the machine with the web browser (same rclone
version recommended):
        rclone authorize "drive" "eyJzY29wZSI6ImRyaXZlIn0"
Then paste the result.
Enter a value.
config_token>
没有授权链接了,
所以只能本地 windows 上弄好了,再把配置文件传到 vps 上了。
配置
google drive盘有区分个人盘和团队盘
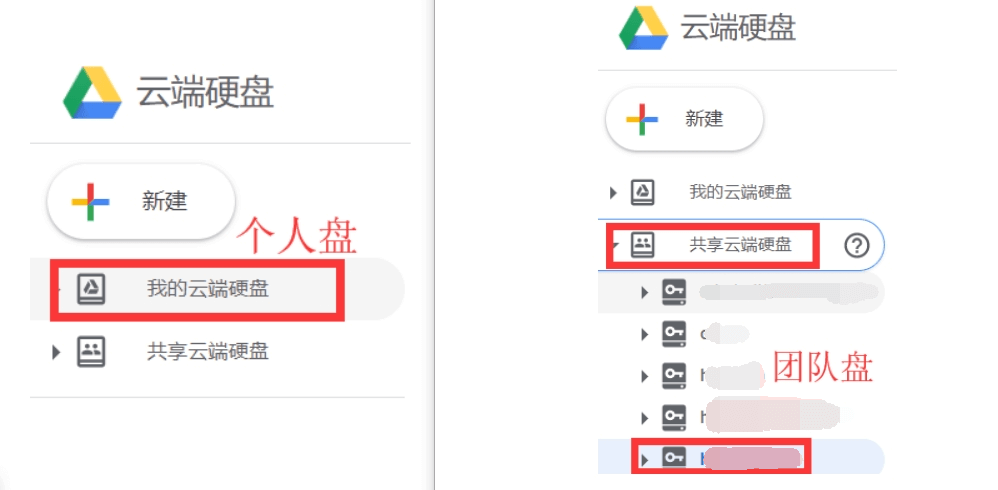
演示个人盘配置,团队盘也大同小异。
# 输入 rclone config

Current remotes:

Name                 Type
====                 ====

e) Edit existing remote
n) New remote
d) Delete remote
r) Rename remote
c) Copy remote
s) Set configuration password
q) Quit config
e/n/d/r/c/s/q> n

# 输入 n


Enter name for new remote.
name> google-drive-ceshi

# 输入网盘的名字
弹出一大堆网盘序号
Option Storage.
Type of storage to configure.
Choose a number from below, or type in your own value.
 1 / 1Fichier
   \ (fichier)
 2 / Akamai NetStorage
   \ (netstorage)
 3 / Alias for an existing remote
   \ (alias)
....
18 / Google Drive
   \ (drive)

Storage> 18


# 找到 Google Drive 这里可以看到是 18 号
回车
Option client_id.
Google Application Client Id
Setting your own is recommended.
See https://rclone.org/drive/#making-your-own-client-id for how to create your own.
If you leave this blank, it will use an internal key which is low performance.
Enter a value. Press Enter to leave empty.
client_id>

# 留空就行

Option client_secret.
OAuth Client Secret.
Leave blank normally.
Enter a value. Press Enter to leave empty.
client_secret>

# 留空就行
当然这里你也可以自己配置 GoogleDriveAPI。
Google API 控制台地址
https://console.developers.google.com/
我们还是直接留空默认得了。
Option scope.
Scope that rclone should use when requesting access from drive.
Choose a number from below, or type in your own value.
Press Enter to leave empty.
 1 / Full access all files, excluding Application Data Folder.
   \ (drive)
 2 / Read-only access to file metadata and file contents.
   \ (drive.readonly)
   / Access to files created by rclone only.
 3 | These are visible in the drive website.
   | File authorization is revoked when the user deauthorizes the app.
   \ (drive.file)
   / Allows read and write access to the Application Data folder.
 4 | This is not visible in the drive website.
   \ (drive.appfolder)
   / Allows read-only access to file metadata but
 5 | does not allow any access to read or download file content.
   \ (drive.metadata.readonly)
scope> 1

# 输入 1 大概就是完全读写什么的意思吧。
回车
Option service_account_file.
Service Account Credentials JSON file path.
Leave blank normally.
Needed only if you want use SA instead of interactive login.
Leading `~` will be expanded in the file name as will environment variables such as `${RCLONE_CONFIG_DIR}`.
Enter a value. Press Enter to leave empty.
service_account_file>

# 留空就行

Edit advanced config?
y) Yes
n) No (default)
y/n>

# 输入 n
回车
Use auto config?
 * Say Y if not sure
 * Say N if you are working on a remote or headless machine

y) Yes (default)
n) No
y/n>

# 输入 n
# 提示:

Option config_token.
For this to work, you will need rclone available on a machine that has
a web browser available.
For more help and alternate methods see: https://rclone.org/remote_setup/
Execute the following on the machine with the web browser (same rclone
version recommended):
        rclone authorize "drive" "eyJzY29wZSI6ImRyaXZlIn0"
Then paste the result.
Enter a value.
config_token> 等待输入

# 回到本地 windows 上
进入:https://rclone.org/downloads/。或者:https://github.com/rclone/rclone/releases
下载 windows 平台的 rclone ,解压到D盘的 rclone 文件夹中
管理员命令提示符(cmd)输入下面的命令,回车
cd /d d:\rclone
rclone authorize "drive"
会自动打开浏览器让你登录你的google账户
2022/09/08 20:48:57 NOTICE: If your browser doesn't open automatically go to the following link: http://127.0.0.1:53682/auth?state=UU6CUOXSsy5
2022/09/08 20:48:57 NOTICE: Log in and authorize rclone for access
2022/09/08 20:48:57 NOTICE: Waiting for code...

# 就会出现这种提示,并且会自动打开浏览器进行授权操作。
登录你的账户

点击允许后,浏览器出现Success!提示证明成功了。
但这时候,回到 cmd 你会发现要么什么都没发生。
要么就报错了,并没有获取到 code ,如下:
D:\rclone>rclone authorize "drive"
2022/09/08 21:26:41 NOTICE: If your browser doesn't open automatically go to the following link: http://127.0.0.1:53682/auth?state=ZS_qwXgONOlPG
2022/09/08 21:26:41 NOTICE: Log in and authorize rclone for access
2022/09/08 21:26:41 NOTICE: Waiting for code...
2022/09/08 21:26:48 NOTICE: Got code
Error: failed to get token: Post "https://oauth2.googleapis.com/token": read tcp 192.168.1.12:57631->172.217.160.74:443: wsarecv: An existing connection was forcibly closed by the remote host.
Usage:
  rclone authorize [flags]

Flags:
      --auth-no-open-browser   Do not automatically open auth link in default browser
  -h, --help                   help for authorize

Use "rclone [command] --help" for more information about a command.
Use "rclone help flags" for to see the global flags.
Use "rclone help backends" for a list of supported services.

2022/09/08 21:26:53 Fatal error: failed to get token: Post "https://oauth2.googleapis.com/token": read tcp 192.168.1.12:57631->172.217.160.74:443: wsarecv: An existing connection was forcibly closed by the remote host.
原因就是网络问题了。
win下本地 rclone authorize 之前要设置 cmd 走代理才行。
暂时使用代理,你可以在windows的cmd命令行中,执行下面命令:
# 使用sock5代理

set http_proxy=socks5://127.0.0.1:7890
set https_proxy=socks5://127.0.0.1:7890

# 至于这个端口号是具体多少?需要看你的代理软件设置的是多少。

# 一般 clash 默认的是 7890
# v2rayN 默认是 10808

# 如果你要取消设置:

set http_proxy=
set https_proxy=

# 临时生效,当你关闭cmd,再次打开时,这些设置将会失效。
然后再一次进行上述授权操作,浏览器出现Success!提示证明成功。
出现大一串字符。
复制 access_token 注意:连同大括号一同复制,从大括号开始到大括号结束。
然后把复制的 code 粘贴到 SSH 终端上回车。
Configure this as a Shared Drive (Team Drive)?

y) Yes
n) No (default)
y/n>

#输入 n 默认回车就是 n 了

Configuration complete.
Options:
- type: drive
- scope: drive
- token: {"access_token":"ya2PJrRmKORRz9dTlkq-on8XQQE65dr8CQEx-3PjmyPoFw6VxZxYYw0163","token_type":"Bearer","refresh_token":"1//0e7xWWDX2tRgPCgYIARAAGA4SNwF-L9Irvw-ZnCue7vgz6kb6jYstKGyZsBliCvNGbj9tWd1mZGEoegiCYxoPIU0z9j6nmFck41c","expiry":"2022-09-08T22:42:59.5596286+08:00"}
- team_drive:
Keep this "1" remote?
y) Yes this is OK (default)
e) Edit this remote
d) Delete this remote
y/e/d>

# 输入 y 完成。
团队盘/共享盘
跟个人盘差不多,只不过进行到最后有一些差异
2022/09/13 14:38:20 NOTICE: If your browser doesn't open automatically go to the following link: http://127.0.0.1:53682/auth?state=XK4Khs8g
2022/09/13 14:38:20 NOTICE: Log in and authorize rclone for access
2022/09/13 14:38:20 NOTICE: Waiting for code...
2022/09/13 14:38:25 NOTICE: Got code
Configure this as a Shared Drive (Team Drive)?

y) Yes
n) No (default)
y/n> y

# 这里会提示,Configure this as a Shared Drive (Team Drive)? 将此配置为共享驱动器(团队驱动器)?默认回车是 N ,如果是团队盘/共享盘的话,要选 y 。

Option config_team_drive.
Shared Drive
Choose a number from below, or type in your own string value.
Press Enter for the default (0AGt8URxxxxPVA).
 1 / Patricia
   \ (0AGtXXXXX9PVA)
config_team_drive>

# 然后就会检测你的账户下有几个团队盘/共享盘,这串代码的意识就是:https://drive.google.com/drive/u/2/folders/0AGtXXXXX9PVA
# 点开你的团队盘/共享盘,网址栏最后那一串代码。
# 然后一路回车就行了。
上传命令
上传之前别忘装一个 screen
一般情况上传的时候,我们把终端一关闭,程序运行就停止了,但有时候上传的文件比较多,总不能一直开着终端,所以 screen 的做用就是让你关闭终端后依旧保持上传。
apt-get install -y screen
测试一下上传。我把服务器本地的**/root/download/目录里面的文件复制到谷歌云的upload**目录里。
开启4线程,并显示上传详情
命令就是:
screen rclone copy /root/download/ gd-ceshi:/upload --transfers 4 -P

# 你说你不想复制?想上传完就删除本地的文件?
## 那就把 copy 这个参数 改成 move

# 你说你的服务器cpu性能强劲?网速也快?4线程太慢了,想要12线程?
## 那就把--transfers 4 这个 4 改成 12

# 你说你想反过来?把云盘的文件下载到服务器本地?
## 那就倒过来:screen rclone copy gd-ceshi:/upload /root/download/ --transfers 4 -P